About
Models
Options
Software
Upgrade
CloudCom

Adding New Functionality to an Existing Phase-Guard

Phase-Guard units can be upgraded at any point in the field to add additional features and functionality that were not initially included at the factory. This flexibility allows your existing Phase-Guard can be customized to accommodate any changes in your requirements or environment. The Phase-Guard can be adjusted to fit your specific needs even when your needs change.
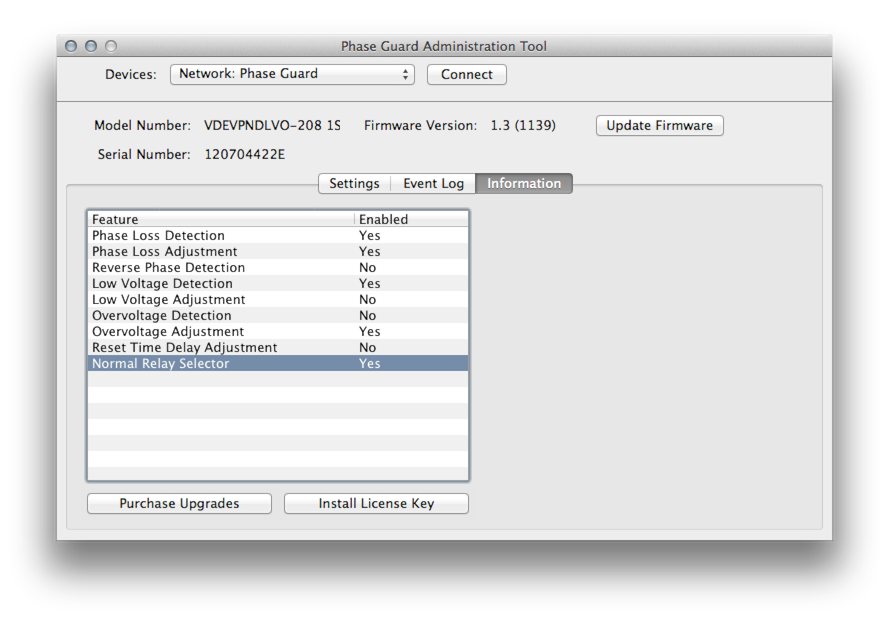
Browse a List of Available Upgrade Features

How to Upgrade Your Phase-Guard - (PDF Version)

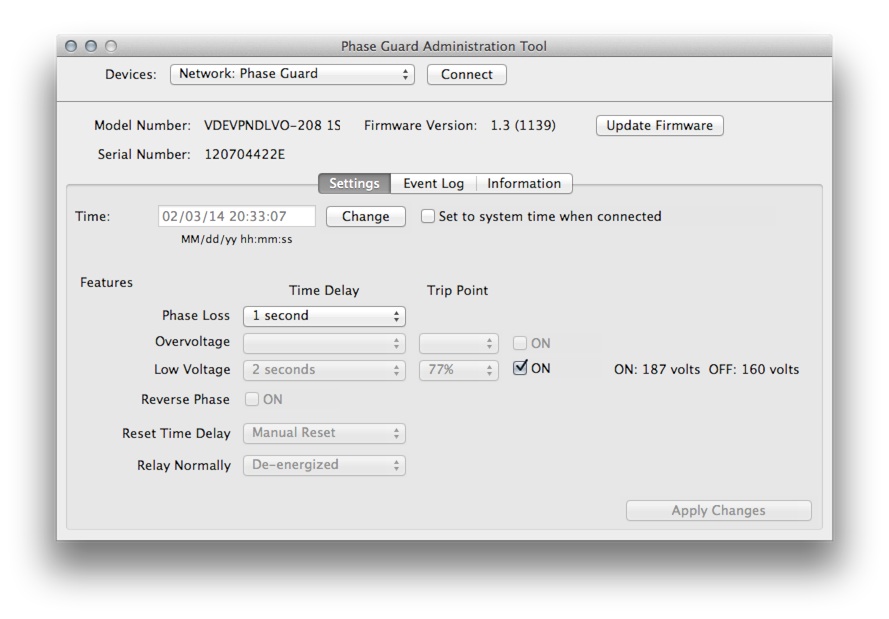
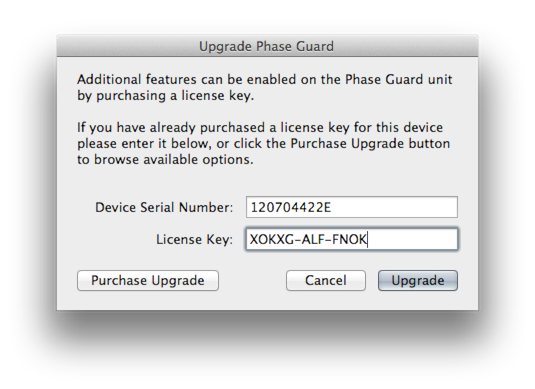
These instructions will walk you through the process of purchasing new features or functionality for your Phase-Guard and installing the new license key in the Admin Software to update and configure the actual unit.

  1. Download and install the Admin Tool software. Admin Tool Download Page
  2. Connect the Phase-Guard to 3 phase power and power up.
  3. Connect the Phase-Guard to the computer with a mini USB cable. USB A to mini B cable.
  4. Double click the Admin Tool application to launch it.
  5. Establish a connection with the Phase-Guard. The connection should automatically be made when the application launches.
    If the connection fails try refreshing the device list and reconnecting. If the connection still cannot be established try these Troubleshooting Steps.
  6. Go to the "Information" tab. This tab contains a list of all features and if they are available on the currently attached Phase-Guard.
  7. Click on the "Purchase Upgrades" button. This will launch your web browser and take you to the Taylor Electronics store page for upgrading that device.
    If you would like to purchase the upgrade from a different computer than the one connected to the Phase-Guard or do not have internet access on that system, then you can go directly to the store upgrade page and enter the serial number of the Phase-Guard that is being upgraded.
    Purchase Phase-Guard Upgrade Now
  8. The web store will reflect which features the particular Phase-Guard already has enabled as well as providing a list of features that are available for purchase. Select any new features you wish to upgrade with and complete the store checkout.
  9. After the order has been completed a license key will appear on the order confirmation page. A copy of this license key and invoice is also emailed to the billing email address on the order. This is the license key that will be installed on the Phase-Guard to complete the upgrade.
  10. Go back into the Admin Tool software. On the "Information" tab again, click the "Install License Key" button. Enter the license key that was received after the order was completed and press the "Upgrade" button.
    Once the license key has been accepted, the list of available features in the "Information" tab will be updated to reflect the newly added functionality from the upgrade.
  11. Switch to the "Settings" tab and make any necessary setting adjustments to go along with the new functionality of the Phase-Guard.